ive blackworms (Lumbriculus variegatus) are regarded as one of the best live food options on the market. They are easy to maintain, durable, and are appealing even to the pickiest aquarium fish. However, the downside is that they do not reproduce as quickly as other live food options. If you are looking for a high protein nutrient rich worm, and you don’t mind the long reproduction time, then blackworms are your delicacy of choice!
Step 1: Housing
Blackworms do not need a complicated tank set-up. All you need is a non-toxic container that can hold at least 3 gallons of water. Do not use tap water to fill your tank because blackworms are highly intolerant to chlorine. Spring water is ideal or you can use old aquarium water from another tank.
Aeration is achieved though the simple use of a sponge or air stone filter. Sponge filters can cause a problem because blackworms tend to attach themselves to the sponge itself, creating a bit of labor during extraction that can cause death. Aeration can be used to facilitate worm reproduction by breaking up worm clumps into smaller groups. This allows for more space for reproduction, or more specifically, fragmentation.
Frequent water changes are necessary because blackworms require daily feeding, or once every two days depending on amount of worms, which produces a lot of waste. The more worms in your tank the quicker the water will begin to foul. An average culture requires at least 50% of its water changed every 5-6 days. Frequent water changes is the most tedious aspect of worm culture, make sure you are prepared for this commitment before starting.
Step 2: Feeding
There are a few different ways to feed your blackfish culture. One popular method utilizes paper towels to create edible bacteria for your worms feed on. To use this method, simply use brown paper towels as the substrate in your tank. The downside here is that the worms attach themselves to the brown paper. Resulting in residual paper being carried into your fish tank. This can be very frustrating because it is nearly impossible to separate the black worms from the paper once they are attached.
The problem worms cause with substrate is that they get very tightly wound with whatever material you use. They also require the substrate to provide some kind of additional food in the form of bacteria. A better solution to this problem is to use a very thin layer of gravel substrate. If you add too much gravel to your tank the worms will get tangled up underneath the rocks making extraction difficult.
Gravel substrate will not provide the food worms need to survive. To solve this problem add some java moss or water sprite to your tank. These plants work well because they thrive in uprooted shallow water environments. Plants however, provide less bacteria than the brown paper towel method. Adding a daily dose of basic fish food flakes is necessary to adequately feed your blackworms using this alternative method.

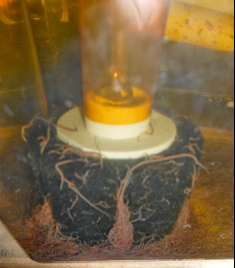
(Paper towel as substrate)
Step 3: Harvesting
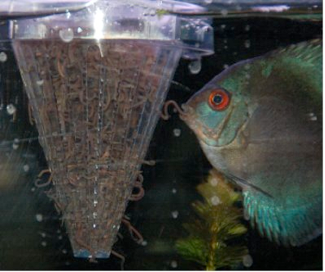
Finally all your hard work has paid off! Now you have doubled your blackworm population and are ready to begin your extraction. If you are not afraid of getting your hands dirty, a simple scoop of your hand will work just fine. More precise methods for extraction utilize turkey baster type tools of various sizes.
Once you have the worms they must be rinsed off before being placed in another tank. Because of the blackworms durability they will be able to survive until they are eaten. Be careful though, if you put too many blackworms in your fish tank they may begin to reproduce. The last thing you want for your show tank is a gang of worms taking attention away from the beautiful ecosystem you have created!
Where do you get your starter batch